How to Visualise and Calculate Video Quality

I hope you are doing well nowadays, and staying safe at home 😷
Today I’m going to talk about video. Nope, not about Game of Thrones :) or any of these funny cat videos that we all love so much. We will be talking today about video quality in simple words, to make it easier for everyone to understand.
The first part of the article could be interesting for everyone and it will explain to you the basics of video quality and bitrate.
The second part is more specific, and more for people who are involved in the video industry. But I guess that could be interesting for other people, too.
It’s really difficult to talk about video without any kind of images. So, the VQ Probe will be assisting me in this article. This is a brand-new product made by ViCueSoft that allows you to analyze video quality, and provides a convenient way to compare two videos side-by-side in a split window and to compare source and encoded videos, as well as displaying video quality metrics.
So, first of all, I have to say the obvious thing: not all videos have the same quality. It can vary so much depending on many factors, such as:
- source quality: such as when you upload your old 90's VHS-based videos on YouTube
- encoding quality: when you choose the wrong settings in OBS while streaming a video game to Twitch
- slow network connection: when you’re on a streaming platform and you’re watching the latest episode of your favourite series, watching with as low a quality as your connection can pump through, just to make sure you’re able to watch the video at all in the first place.
First things first, let’s prepare test samples that will be used in the article. We will do it by using FFmpeg. I will attach all the command lines here, so you’ll be able to do the same on your own. We will create a few sample video encoded files from the same source video, but in different bitrates. If you already have video files to get metrics for, just take them without creating any of the new ones.
So here is how I’m gonna create the first file:
$ ffmpeg -i tractor_1080p25_300frames.y4m -c:v libx264 -b:v 500k -frames 300 tractor_1080p25_300frames_encoded_500kbps.h264
Here we encode the input source uncompressed video file tractor_1080p25.y4m to the output tractor_1080p25_encoded_100kbps.h264 using H.264/AVC codec with the bitrate 500 kbps.
Next, we will do the same for the second one:
$ ffmpeg -i tractor_1080p25_300frames.y4m -c:v libx264 -b:v 5000k -frames 300 tractor_1080p25_300frames_encoded_5000kbps.h264
As you may guess, we have just encoded the same source file with 5 Mbps using the same H.264/AVC codec.
Now we have 3 files. Let’s take a look on their sizes:
tractor_1080p25_300frames.y4m — 933'121'860 bytes
tractor_1080p25_300frames_encoded_500kbps.h264–779'142 bytes
tractor_1080p25_300frames_encoded_5000kbps.h264–7'281'894 bytes
In other words, we have compressed the source file in 1198 times and in 128 times for 500 kbps and 5 Mbps, respectively.
Looks good. But what about quality? Let’s take a look.
As I already mentioned, we will use the VQ Probe for the purpose of video quality metrics calculation, as well as to visualise these metrics.
You can download the appropriate version for your operating system from the official site — https://vicuesoft.com/products/probe. The tool is available for Windows, MacOS, and Linux. It’s absolutely free and does not require installation. So you can get it working very quickly by repeating the steps from the article.
I’m launching the tool and I see the main screen:
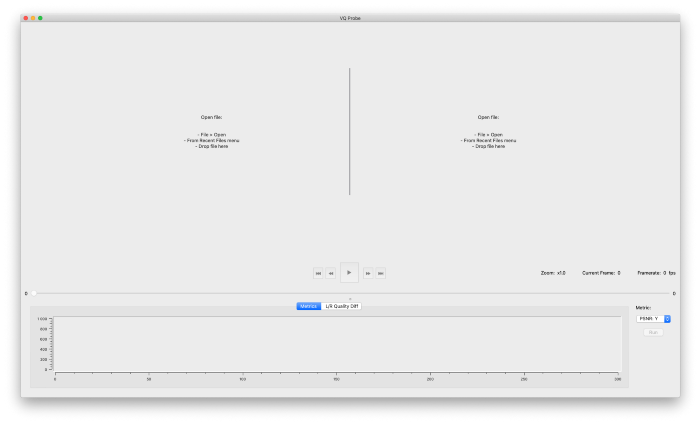
It’s pretty simple yet powerful, and does exactly what we need in the scope of this article.
At the next step we will add files. We can easily drag & drop them on the main area as a text on the main window mentions, but we will do the same via the main menu to make it clearer to show here.
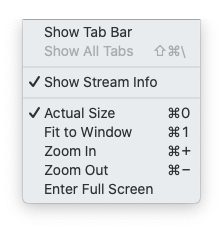
By opening the File menu we can see the following options:
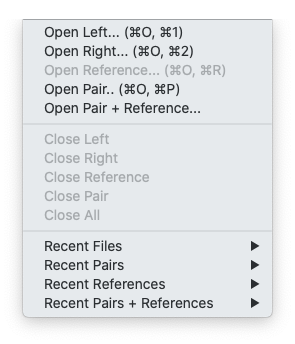
You may see a lot of convenient options here depending on the user’s needs. What we currently need is the 4th one — Open Pair… Click on it, and then choose the two encoded files:
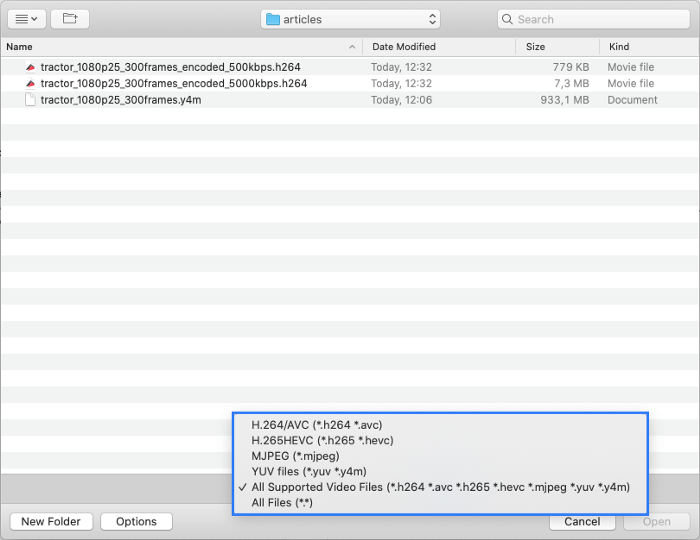
Please make sure you choose the appropriate filter to display files of required types. I’m using the All Supported Video Files option.
Click Open, and voila:
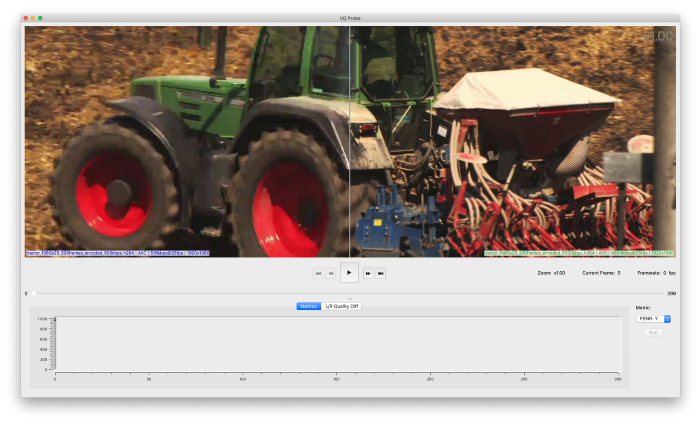
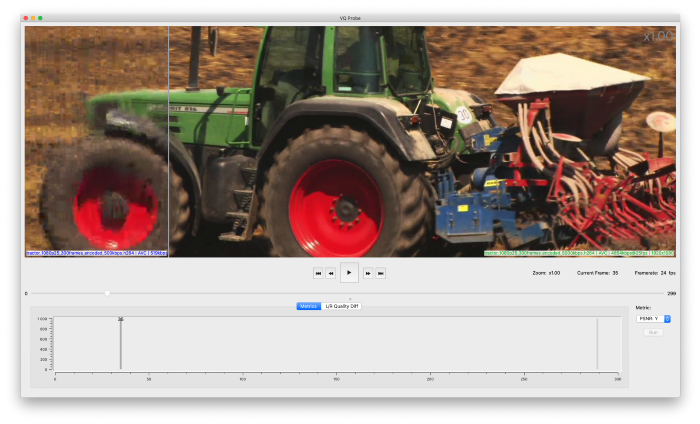
Now we can compare the two files in convenient way by moving the vertical split-line and using different zoom options:
Now, I’m going to highlight the visual differences of the two encoded files. To do so, let’s press the Play button. Both files are playing back. Then we wait until the difference is distinct, and press the Space button (to pause the playback). Here is what we’ve got:
Let’s use Cmd + left mouse key to zoom in on a specific area and the difference becomes even more obvious:
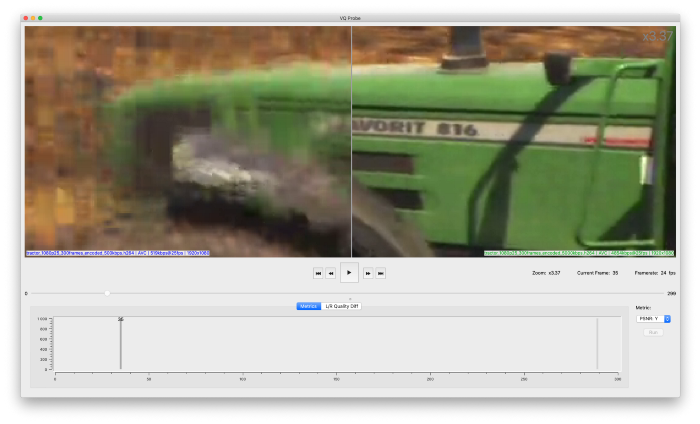
The difference is so visible, isn’t it? As a reminder: the left video is 500 kbps and the right one is 5 Mbps.
Everything we were talking about before is called subjective quality metrics. In other words, it can vary depending on a person, monitor settings and so on. There are another group of metrics, called objective quality metrics. They are based on mathematical calculation of the difference between one video and another (in most cases this is a source video and an encoded video).
So, let’s check how objective metrics correspond to subjective metrics. To do so, we need to add a reference file, a file we have created encoded files from. In our case it is tractor_1080p25_300frames.y4m.
Note: generally, a reference file is a YUV file, or uncompressed video files. But the VQ Probe allows you to choose any supported video files, e.g. another encoded video. For example, if you want to compare H.264/AVC and H.265/HEVC quality, you can choose an AVC file as a reference, and an HEVC file as a target.
We will open the reference file via the File menu again, but will choose the Open Reference… option for now. In the case of Y4M files, the file will be automatically opened as long as such files contain all the required information about an uncompressed video. Otherwise, in the case of YUV files, you will be asked to set width, height, and pixel format for the file in a specific dialog box. Finally, you’ll see that the reference files are opened by seeing information about the file, such as filename, and its characteristics placed on the top of the window. You can always show the reference file in the main window by pressing the Shift button. This is a useful feature when comparing an encoded video with the reference video.
So, we have 3 opened files, therefore the Run button in Metrics View (at the bottom of the window) becomes enabled. Clicking on it will launch the metrics calculation process. Once it’s done, the metrics are available in Metrics View. There are 3 metrics supported by the VQ Probe: PSNR, SSIM, and VMAF. Here is what we’ve got in our case:


The higher the value, the better the quality. It’s obvious from the graphs above that the video file on the right (encoded with 5 Mbps) has better quality than the one on the left side (encoded with 500 kbps). Let’s see the exact difference by choosing another tab, L/R Quality Diff:
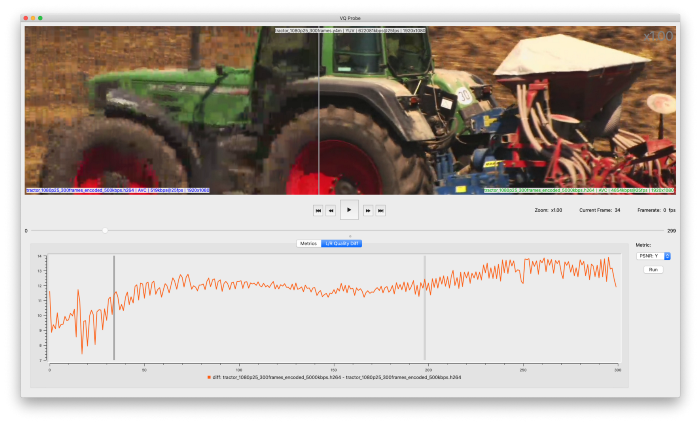
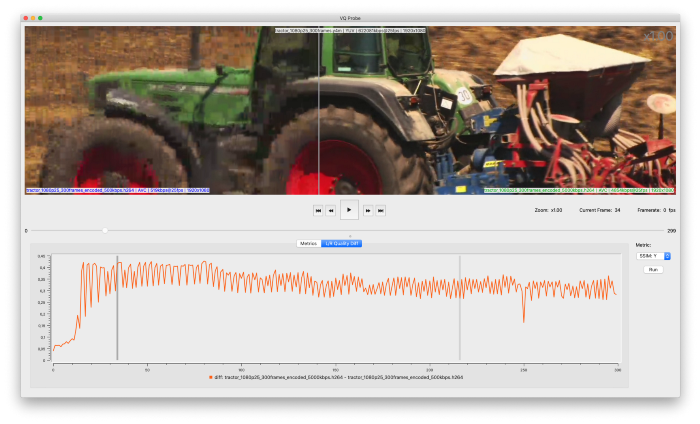
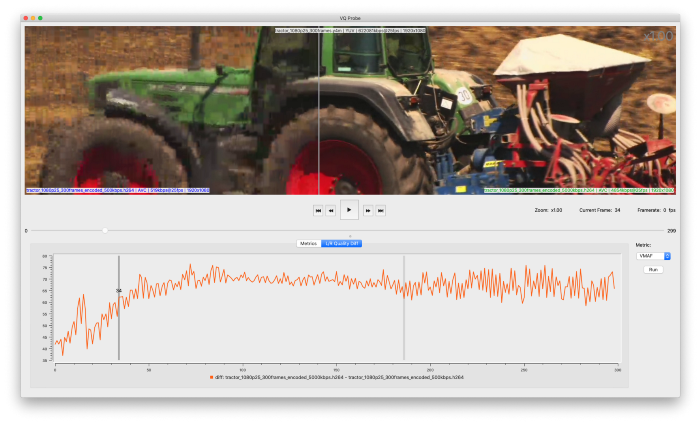
Well, it’s easy to see that the file encoded with 5 Mbps has much better quality than the file encoded with 500 kbps.
All the graphs confirm the conclusion we have made by visual evaluation earlier. Great! That’s exactly what we were looking for. 👍
That was a quick introduction to video quality metrics. We discovered how to check the both objective and subjective video quality of two video files by using the VQ Probe tool. I did not go into details here, but a related series of articles about video quality are coming soon. So,
stay tuned! ✌