How to install & tune Nginx with RTMP module and start streaming through FFmpeg with QuickSync on CentOS.


About Nginx
Nginx is an open-source web server with a lot of functions. It can be used as a load balancer, reverse proxy, mail proxy, HTTP cache, and more. In this article, we will consider Nginx as a video streaming tool. In this case, we will install compile and tune Nginx using RTMP (Real Time Messaging Protocol) module, which is mainly used for streaming video and audio streams from web cameras over the internet.
If you are facing Nginx the first time and you want to install it with RTMP module on CentOS, this tutorial is for you.
Step 1. Preparation
Before we start Nginx installation, we need to install some packages dependencies for its clear work:
sudo yum -y groupinstall 'Development Tools'
sudo yum -y install epel-release
sudo yum install openssl-devel
sudo yum install -y pcre-devel
Step 2. Installation
After installing related attributes, we need to download Nginx archive from Nginx official website: https://nginx.org/download/ (you can choose the version you want) and extract it on your CentOS machine. In this example we have chosen version 1.14.0:
wget https://nginx.org/download/nginx-1.14.0.tar.gz
tar -xzvf nginx-1.14.0.tar.gz
Next, you need to clone Nginx RTMP module using git:
git clone https://github.com/sergey-dryabzhinsky/nginx-rtmp-module.git
Then, go to ‘nginx-1.14.0’ directory and configure Nginx with parameters below:
cd nginx-1.14.0/./configure --prefix=/etc/nginx --sbin-path=/usr/sbin/nginx --modules-path=/usr/lib64/nginx/modules --conf-path=/etc/nginx/nginx.conf --error-log-path=/var/log/nginx/error.log --pid-path=/var/run/nginx.pid --lock-path=/var/run/nginx.lock --user=nginx --group=nginx --build=CentOS --builddir=nginx-1.14.0 --http-log-path=/var/log/nginx/access.log --http-client-body-temp-path=/var/cache/nginx/client_temp --http-proxy-temp-path=/var/cache/nginx/proxy_temp --http-fastcgi-temp-path=/var/cache/nginx/fastcgi_temp --http-uwsgi-temp-path=/var/cache/nginx/uwsgi_temp --http-scgi-temp-path=/var/cache/nginx/scgi_temp --with-select_module --with-poll_module --with-threads --with-file-aio --with-http_ssl_module --with-http_v2_module --with-http_realip_module --with-http_addition_module --with-http_sub_module --with-http_dav_module --with-http_flv_module --with-http_mp4_module --with-http_gunzip_module --with-http_gzip_static_module --with-http_auth_request_module --with-http_random_index_module --with-http_secure_link_module --with-http_degradation_module --with-http_slice_module --with-http_stub_status_module --with-mail=dynamic --with-mail_ssl_module --with-stream=dynamic --with-stream_ssl_module --with-stream_realip_module --with-stream_ssl_preread_module --with-compat --add-module=../nginx-rtmp-module --with-debug
After configuring Nginx, you need to make and install it:
sudo make
sudo make install
To check Nginx version and installed modules use:
nginx -V
Step 3. Tuning Nginx
After installing, create the module link to the Nginx directory:
sudo ln -s /usr/lib64/nginx/modules /etc/nginx/modules
If Nginx is going to use any folders, you need to create Nginx-user and group and change the owner and group of these folders to Nginx:
sudo useradd -r -d /var/cache/nginx/ -s /sbin/nologin -U nginx
chown -R nginx:nginx <path-to-folder-which-nginx-uses>
As we are going to run Nginx as a service, we need to create nginx.service file along this path /usr/lib/systemd/system/ with the following content (copy text below to your nginx.service file):
[Unit]
Description=nginx - high performance web server
Documentation=https://nginx.org/en/docs/
After=network-online.target remote-fs.target nss-lookup.target
Wants=network-online.target[Service]
Type=forking
PIDFile=/var/run/nginx.pid
ExecStartPre=/usr/sbin/nginx -t -c /etc/nginx/nginx.conf
ExecStart=/usr/sbin/nginx -c /etc/nginx/nginx.conf
ExecReload=/bin/kill -s HUP $MAINPID
ExecStop=/bin/kill -s TERM $MAINPID[Install]
WantedBy=multi-user.target
After all these steps, you can finally start Nginx:
sudo service nginx start
If you want Nginx to run every time with system starting, you can enable it:
sudo systemctl enable nginx
Step 4. RTMP configuration
You can find Nginx working configuration in /etc/nginx/nginx.conf.
If you want to create a configuration for the RTMP module, you need to add it to nginx.conf file.
For a live streaming example:
#user  nobody;
worker_processes  1;#error_log  logs/error.log;
#error_log  logs/error.log  notice;
#error_log  logs/error.log  info;#pid        logs/nginx.pid;events {
    worker_connections  1024;
}# RTMP configuration
rtmp {
    server {
        listen 1935; # Standard port
        chunk_size 8192;
        # Application configuration
        application origin_ffmpeg_1 {
            live on;
            record off;
            meta copy;
            exec ffmpeg -i rtmp://localhost:1935/origin_ffmpeg_1/$name <parameters/libs/modules> rtmp://localhost:1935/live_ffmpeg_1/$name_1;
        }        application live_ffmpeg_1 {
            live on;
            record off;
        }
    }
}
After you have changed anything in nginx.conf file, to apply your changes you always need to restart Nginx:
sudo systemctl restart nginx
That how we successfully completed Nginx installation & tuning with RTMP module on CentOS machine.
Step 5. Installing MSDK
Now we need to install Intel MediaSDK to build ffmpeg with QuickSync. First of all, you need to clone Intel MediaSDK from github:
git clone https://github.com/Intel-Media-SDK/MediaSDK.git msdk
After that, you have to go to the cloned project directory and build it:
cd msdk/ && mkdir build && cd build && cmake .. && make
After building MSDK in msdk/build/__bin/release there will appear libmfx.pc file, which is needed for building FFmpeg with QuickSync. You need to return to your working directory (where msdk folder is located) and export PKG_CONFIG_PATH to folder with libmfx.pc file:
export PKG_CONFIG_PATH=./msdk/build/__bin/release
Step 6. Installing FFmpeg
Now, you can clone FFmpeg project:
git clone https://github.com/FFmpeg/FFmpeg.git ffmpeg
cd ffmpeg
When you clone FFmpeg, you need to configure it using the options below:
./configure — enable-libmfx — enable-nonfree
After successful configuration, you can see h264_qsv option in logs. It means, that FFmpeg found QuickSync and configured with it. Now you can make and install FFmpeg:
sudo make && sudo make install
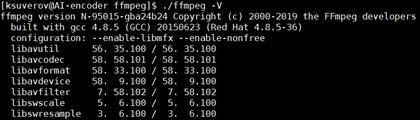
After installing FFmpeg, check FFmpeg installed components: --enable-libmfx means that QuickSync installed successfully:
Step 7. Installing Media Driver
If you don’t have Media Driver (iHD_drv_video.so) installed on your computer or your driver version is not suitable to run FFmpeg (you can go to step 8, and if it has problem with a driver, return to step 7), you need to build it because it is necessary to run FFmpeg. First of all, you need to install master branches of Libva and GmmLib from github.
After that, you need to clone Intel Media Driver project from github:
git clone https://github.com/intel/media-driver.git
Then, you need to go to the driver’s folder, create a folder for a build, and make it:
cd media-driver && mkdir build && cd build/ && cmake .. && make
Finally, you will get iHD_drv_video.so file and now you need to specify LIBVA environmental variables:
export LIBVA_DRIVERS_PATH=/path/to/iHD_drv_video.so/
export LIBVA_DRIVERS_NAME=iHD
Step 8. Launch FFmpeg through Nginx
Now you can move on to integrate FFmpeg into Nginx. You need to edit your nginx.conf file and use FFmpeg with QuickSync as executing command. In this example I will add some parameters for transcoding and dump all FFmpeg logs to /home/tmp (Nginx is owner and group of tmp folder — step 3):
rtmp {
    server {
        listen 1935; # Standard port
        chunk_size 8192;
        # Application configuration
        application origin_qsv_1 {
            live on;
            record off;
            meta copy;
            exec ffmpeg -hwaccel qsv -c:v h264_qsv -i rtmp://localhost:1935/origin_qsv_1/$name -map 0 -c:v h264_qsv -profile:v baseline -preset medium -b:v 1000K -f flv -c:a copy -f flv rtmp://localhost:1935/live_qsv_1/$name_1 2>>/home/tmp/ffmpeg_1;
        }        application origin_qsv_2 {
            live on;
            record off;
            meta copy;
            exec ffmpeg -hwaccel qsv -c:v h264_qsv -i rtmp://localhost:1935/origin_qsv_2/$name -map 0 -c:v h264_qsv -profile:v baseline -preset medium -b:v 1000K -f flv -c:a copy -f flv rtmp://localhost:1935/live_qsv_2/$name_2 2>>/home/tmp/ffmpeg_2;
        }        application live_qsv_1 {
            live on;
            record off;
        }
        application live_qsv_2 {
            live on;
            record off;
        }
    }
}
Save and exit.
After this, you can launch broadcasting using Nginx. Choose the stream you want to transcode and start:
ffmpeg -re -i /path/to/stream/stream.mp4 -map 0 -c copy -f flv rtmp://localhost/origin_qsv_1/mystream
*NB:* You can vary both the number of parallel sessions and the number of outputs for each session. Here is an example to add one more output:
ffmpeg -re -i /path/to/stream/stream.mp4 -map 0 -c copy -f flv rtmp://localhost/origin_qsv_1/mystream -map 0 -c copy -f flv rtmp://localhost/origin_qsv_2/mystream
*P.S.* If you have a driver’s problem, please return to step 7. If you have already completed step 7, and the problem is not solved, add LIBVA_DRIVERS_PATH to nginx.conf file (make sure that Nginx has permissions to use iHD driver from the directory where it is located):
env LIBVA_DRIVERS_PATH=/path/to/iHD/driver;
Step 9. Visual check that transcoding works in broadcasting
Before launching the transcoding, you can run FFplay to see, what will be in your output. For this, you need to choose the output you want to see and add it to FFplay. For example, you want to see output stream from 1st application (instead of $name variable you need to substitute the name of your output stream from launching FFmpeg, for example, mystream):
ffplay -v debug rtmp://localhost:1935/live_qsv_1in1_1/mystream_1_750
After starting FFplay, you will see something like this:

This means, that FFplay is waiting for the data. You can start streaming like we did in step 7:
ffmpeg -re -i /path/to/stream/stream.mp4 -map 0 -c copy -f flv rtmp://localhost/origin_qsv_1/mystream
After that, FFplay starts playback the transcoded stream, if everything is ok:

big_buck_bunny stream from https://peach.blender.org/
And in ffmpeg logs (which we have sent to /home/tmp), when you open of logs file, you will see something like this:
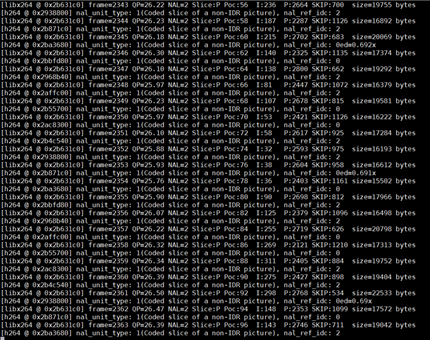
It means, that FFmpeg with QuickSync is working correctly and is transcoding your stream before broadcast.